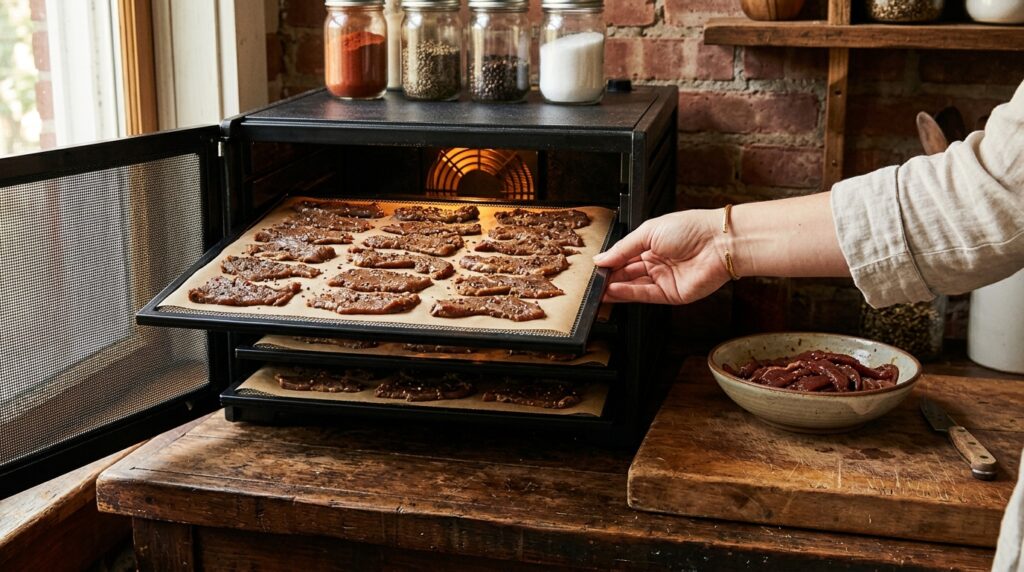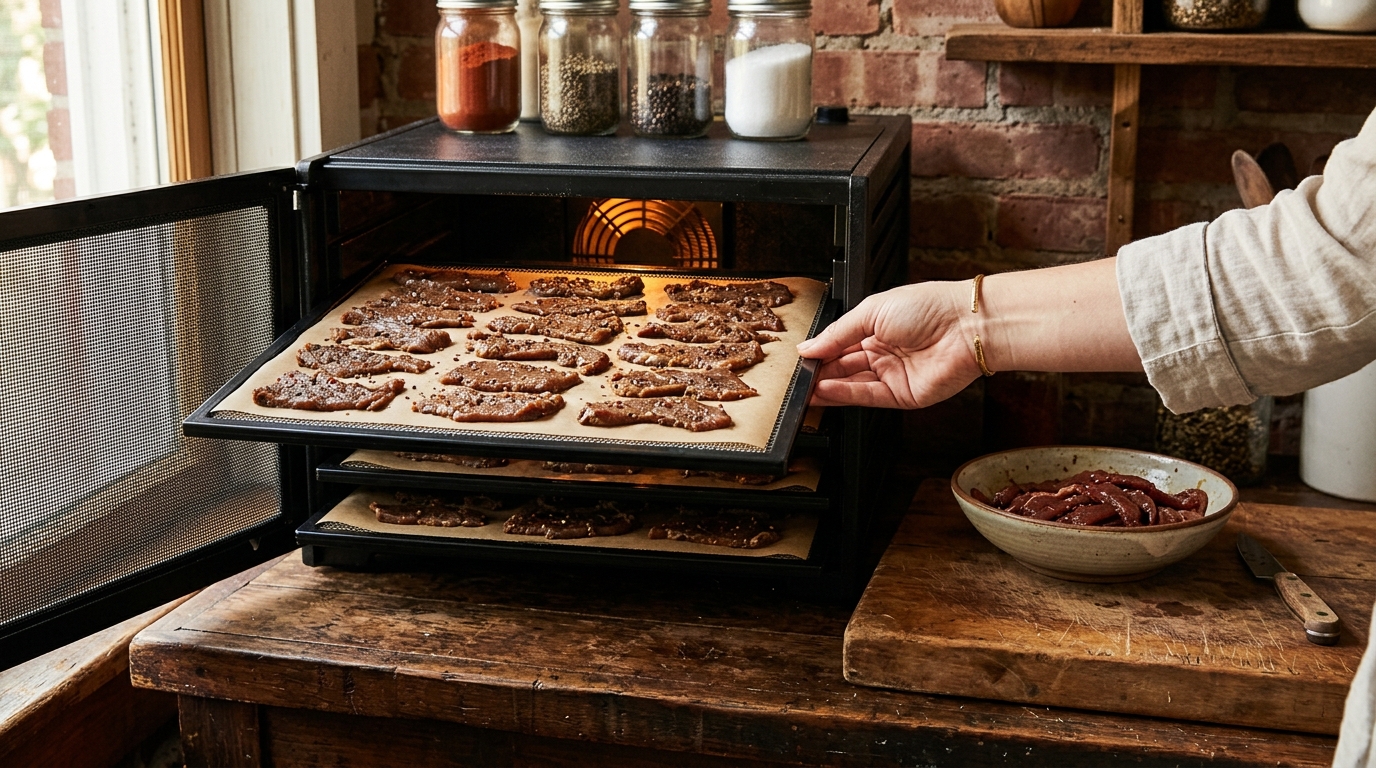
Yes, I can use parchment paper in a dehydrator for jerky if the machine allows it, but I prefer open racks for sliced beef. Parchment helps with sticking and cleanup; it also covers the underside of the meat and can slow drying. That tradeoff matters more than whether the paper survives the heat.
If you are trying to get a batch right without wasting good meat, I’m Sam, a Milwaukee dad of three with eight years and 400-plus batches behind my garage jerky lab. My rule is simple: solve the mess without making the meat harder to dry. Here’s how I decide when parchment earns its place, what to change if a batch stays wet underneath, and which kitchen substitutes I leave in the drawer.
The Short Answer
Can I use parchment paper in dehydrator for jerky? Yes, conditionally: use food-grade baking parchment within its labeled temperature limit, follow your dehydrator’s liner instructions, and keep every air channel clear. For ordinary whole-muscle strips, bare racks or compatible food-grade mesh are better starting points because air can reach both sides.
Heat resistance alone does not establish appliance compatibility. For example, Reynolds rates its unbleached parchment for oven use up to 425°F, well above typical jerky drying temperatures. That rating does not authorize covering your dehydrator’s vents or placing paper near its heater. Check both the paper packaging and the machine manual.
Parchment is most useful when a permitted liner helps support delicate formed strips or release a sticky coating. It is less useful when the only goal is avoiding rack washing. A solid sheet exchanges some cleanup convenience for less exposed drying surface. If your manual prohibits paper or requires a particular accessory, use the approved accessory.
What Is Causing the Problem
A dehydrator needs to move moisture away as well as supply heat. Picture a wet dishcloth spread across a rack versus pressed against a countertop: the covered side has less exposure to moving air. Jerky sitting flat on parchment has a similar disadvantage. The sheet does not make drying impossible, but it changes where moisture can escape.
- A covered underside: Moisture beneath a broad strip has fewer exposed routes out, so the top may look finished while the bottom remains tacky.
- Blocked air channels: Oversized sheets can obstruct a center opening, perimeter passage, rear outlet, or spaces between stacked trays.
- Liquid collecting under the meat: Excess marinade stays on a solid liner instead of draining through the rack. Folded edges make little puddles.
- Uneven preparation: Thick pieces, overlapping strips, and heavy loading magnify the differences between exposed and sheltered areas.
Airflow designs vary. Some machines move air mainly across trays; others rely on passages through or around a stack. A center hole is not necessarily the only opening that matters. Follow the airflow diagram or loading instructions for your model instead of copying a parchment shape from somebody else’s dehydrator.
Why fruit-leather advice does not settle the jerky question
The University of Kentucky’s Drying Food at Home guide permits parchment-lined racks in its fruit-leather instructions. Puree needs support because it would fall through mesh. Beef strips usually support themselves. That makes the liner a different compromise, and the fruit guidance is not a tested meat-safety process.
Likewise, the 2025 study on coated kraft paper and dehydrated peach slices concerns moisture-resistant packaging. It does not test kitchen parchment as a jerky drying surface. Neither source establishes a safe drying time for beef on paper.
Dry-looking meat and safely heated meat are different checks
In a 2009 University of Wisconsin study of ground-and-formed jerky, only 27% of samples achieved at least a five-log reduction in both tested pathogens after 12 hours under the tested conditions. Five-log means a 100,000-fold reduction. This was not a parchment comparison; it shows why time in a dehydrator alone is a poor safety guarantee.
A 2018 study of commercial dehydrator processing also examines the importance of relative humidity during heating. My practical takeaway is to use an established home-jerky heating method. A damp pocket under paper is not controlled humidity and cannot stand in for a validated cooking step.
How I Fix It Batch to Batch
I start with the meat before buying another liner. Lean eye of round or top round makes sense for a family batch: trim visible fat, cut consistently, and avoid paying steak prices for fat that needs trimming anyway. A liner cannot correct thick slabs or an overloaded machine.
- Prepare evenly: For sliced jerky, keep strips no thicker than 1/4 inch. Drain excess marinade before loading, keeping meat refrigerated during preparation.
- Complete the safety heating step: Steam or roast meat to 160°F internally, or poultry to 165°F, before drying. Verify with a food thermometer.
- Load for exposure: Arrange strips in one layer with visible gaps. If parchment is permitted and necessary, cut it to the approved tray area with no overhang or covered vents.
- Inspect underneath: During the batch, check sheltered surfaces. If the underside stays wet, remove permitted parchment when the strips hold together, transfer to clean racks or approved mesh, and continue drying promptly.
The heating recommendation comes from USDA’s Jerky and Food Safety guidance. USDA then recommends maintaining 130–140°F during drying. A dehydrator display measures or targets air temperature; it does not prove the meat reached its required internal temperature. Evaporation can keep wet meat cooler than the surrounding air.
Fit parchment without turning it into a tray lid
Use one flat layer, keeping the manufacturer’s required clearances around every opening. Do not fold it up the tray walls, wrap individual strips, or overlap several sheets. Load it so loose corners cannot lift toward the fan or heater. Do not run loose paper through an empty preheat cycle.
There is no universal safe border width or number of punched holes for every dehydrator. A few fork holes do not turn solid parchment into mesh. If cutting a suitable liner requires guessing where air travels, switch to the manufacturer’s accessory. That is a better use of money than gambling a full load of beef.
Use the least material that solves the actual problem
| Tray surface | Best use | Main tradeoff |
|---|---|---|
| Bare manufacturer rack | Whole-muscle strips that span the openings | Good exposure; sticky marinades need more cleanup |
| Compatible food-grade mesh | Small pieces and easier release | Reusable, but still needs washing and correct fit |
| Permitted baking parchment | Temporary support or release assistance | Disposable and solid; inspect the underside |
| Approved solid silicone or fruit-roll sheet | Foods or drip-catching arrangements specified by the manual | Reusable, but still blocks airflow directly beneath food |
As an Amazon Associate, I earn from qualifying purchases. If small pieces or sticking are recurring problems, compare food-grade dehydrator mesh liners and confirm compatibility with your exact model. Check the material, temperature rating, dimensions, and cleaning instructions. A listing that merely says “nonstick” is not enough.
For checking the heating step, a thin-tip digital food thermometer is a more useful purchase than another stack of disposable liners. Choose one suited to thin foods and follow its insertion-depth instructions. Probe from the side into the center of a thicker strip when possible; touching the pan gives a misleading reading.
My cleanup preference is to drain well and wash racks promptly according to their instructions. For drips, use only the arrangement your manual specifies. For example, NESCO’s dehydrator booklet describes a fruit-roll sheet on the bottom tray for machines with a bottom powerhead. That is not permission to cover the appliance floor with paper.
What to Check First
If the timer says finished but the jerky feels wrong, compare pieces from different trays and different positions. Check both faces, especially the broadest strips. One dry corner piece cannot tell you what happened under a crowded center row.
- Dry top, damp bottom: Suspect the solid liner or a puddle. Restore underside exposure and continue the established drying process.
- Dry edges, soft center: Check thickness and folded meat. Cut a cooled test strip open to inspect texture rather than judging only the surface.
- One tray lags: Check loading, blocked passages, fan operation, and the manual’s tray-rotation guidance.
- Shiny beads that persist: Some shine may be fat rather than water. Blot with a clean paper towel outside the appliance and reassess; drying will not remove fat like moisture.
MU Extension’s jerky instructions recommend uniform slices and describe a test piece that cracks without breaking when bent. Let a sample cool before evaluating texture. This is a dryness check, not proof of pathogen destruction or measured shelf stability. Do not taste questionable jerky to decide whether it is safe.
I would not promise “add 30 minutes” for parchment. Strip thickness, load size, airflow, and marinade all change the result. Record those details alongside the liner choice, then adjust one variable next batch. Buying lean meat in bulk only saves money if the batch dries consistently enough to keep.
Can I use freezer paper in a dehydrator?
Skip freezer paper. It is designed for cold storage, not as a substitute for baking parchment. Reynolds identifies its freezer paper as plastic-coated and warns against oven use because the coating melts. That does not establish a precise melting point in your dehydrator; it means you lack approval for this heated use. Wax paper is also a different product and should not replace parchment here.
Can you use paper towels in a dehydrator?
Use them for blotting, not as tray liners. Take the tray out, blot excess oil with a clean towel, discard the towel, and return the tray promptly. Leaving absorbent paper underneath meat holds liquid against the food, covers openings, and may leave fibers stuck to the surface. Do not line the heater compartment or wrap strips in towels while drying.
Can plastic canvas be used in a dehydrator?
Do not use craft-store plastic canvas. A grid shape does not establish suitability for prolonged heated food contact. Use mesh sold for food dehydration with a stated temperature rating and compatibility with your machine. “BPA-free” by itself does not answer those questions. Manufacturer-supplied plastic screens and needlepoint canvas are not interchangeable.
Can you dehydrate on aluminum foil?
Only where your appliance instructions allow it; I would not choose it beneath jerky. Foil tolerates drying temperatures, but it is still a solid barrier that can collect marinade and leave the underside wet. It can also stick to the meat. Never cover vents or the heater area. For this job, open racks or approved mesh solve more problems.
When to Toss It and Start Over
A wet underside discovered during an otherwise properly heated, continuously running batch is a drying problem you can often correct. Restore airflow and keep drying. A batch with an unknown heating history, a prolonged power failure, or lengthy warm holding needs a safety decision instead. Do not assume that extra dehydrator time, refrigeration, or vacuum sealing repairs unsafe handling.
Discard jerky with mold, slime, an abnormal rotten odor, or melted liner material adhering to it. Discard the entire stored batch sharing a container with mold, rather than trimming individual spots. Smell cannot rule out pathogens, and reheating is not a universal rescue. If you cannot establish that a questionable batch followed a safe process, tossing it is the sensible call.
For a successfully heated and dried batch, cool before packaging so trapped steam does not wet the jerky again. I favor refrigerating homemade jerky and freezing portions for longer keeping, especially when aiming for a softer chew. Label the batch and storage date. A bend test does not measure water activity, the amount of water available for microbial growth, so do not use tenderness alone to promise pantry life.
Bottom Line
Parchment can work in a dehydrator that permits it, but whole-muscle jerky usually benefits more from exposed rack space. Use paper for a specific support or sticking problem, preserve the machine’s air passages, and check the underside before calling the batch finished.
For your next batch, start with evenly sliced lean beef, complete the safety heating step, drain well, and leave gaps on bare racks or compatible mesh. If you need parchment, treat its effect on drying as something to monitor. Easier cleanup is worthwhile when every strip still gets the heat and airflow it needs.