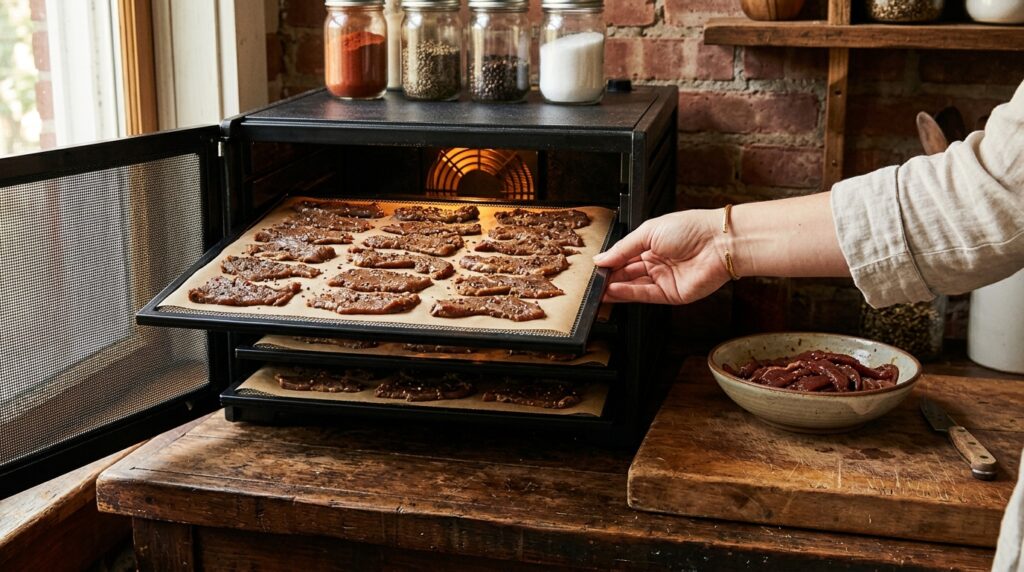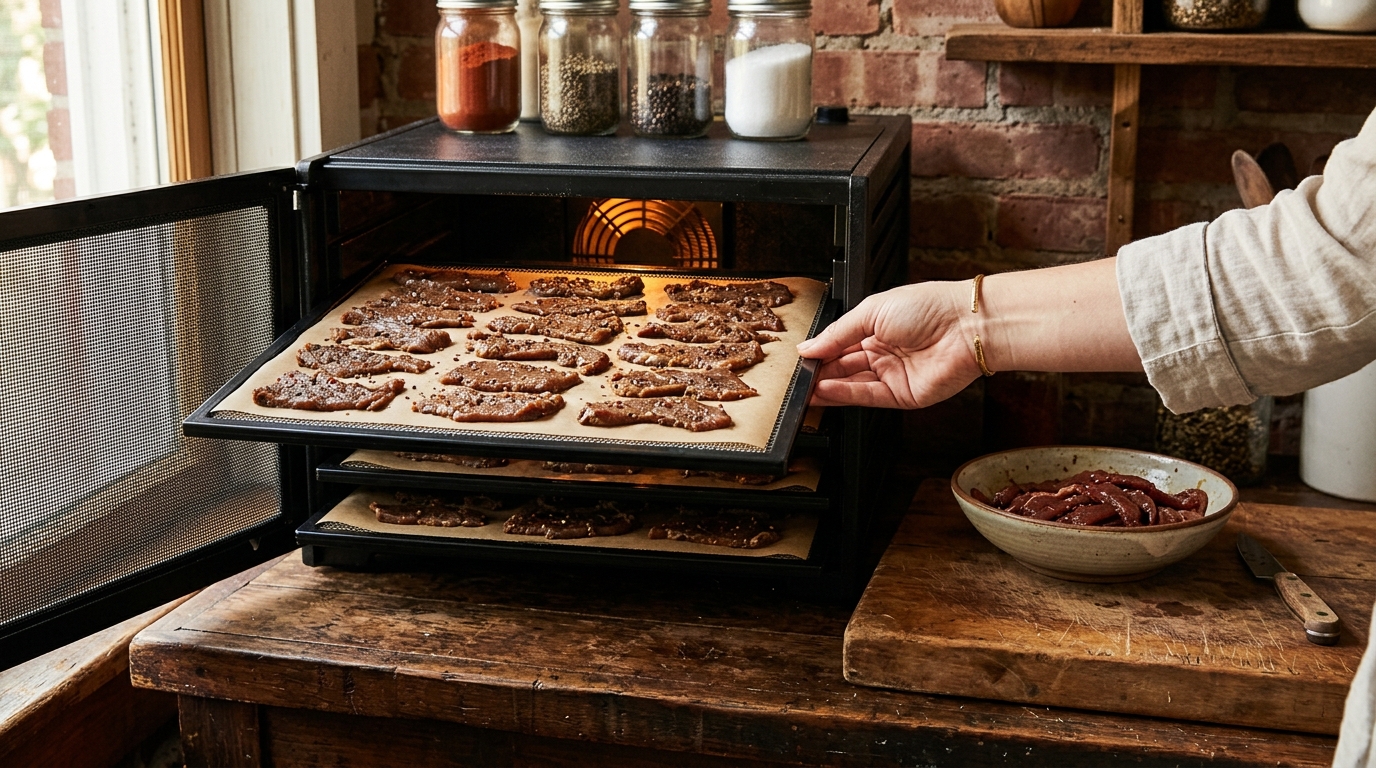
I don’t flip every strip of jerky just because the timer says halfway. If air reaches both sides and the meat is drying evenly, I leave it alone. I turn individual pieces when their undersides stay noticeably wetter, and I rotate trays when one area of the dehydrator dries faster than another. Those are different fixes.
If you are trying to get a batch right without wasting good meat, After eight years and 400-plus batches in my Milwaukee garage jerky lab, I’ve learned that extra handling doesn’t automatically improve the snack bag. With three kids waiting on the finished batch, I want useful checks, not another chore. Here’s how I decide whether to flip jerky strips in a dehydrator, when to move trays, and when to shut the door and let the machine work.
The Short Answer
You usually don’t need to turn jerky strips when they sit on open racks with good airflow and dry evenly on both sides. Flipping becomes useful when a strip’s tray-facing surface remains damp while its upper surface firms up. A liner, heavy coating, or broad patch of contact with the tray can create that difference. Turn the affected pieces once they hold together well enough to lift without tearing.
Tray rotation addresses location, not which face is down. If an entire upper tray lags behind a lower one, swapping their positions may help; if the back of a rectangular tray dries faster, turning that tray front to back may help. Follow your appliance manual’s instructions and tray orientation limits. Don’t assume every stackable machine requires rotation: the NESCO dehydrator guide says its covered models are designed to work without it.
Why This Technique Works
Drying depends on moisture moving out of the meat and air carrying it away. An open rack exposes much of the underside, so the tray doesn’t act like a skillet that cooks only the bottom face. But airflow isn’t necessarily equal everywhere, especially after you load the machine. Before reaching for tongs, identify the pattern:
- One wet underside: Flipping exposes that surface more directly. First separate any touching strips and check whether the tray or liner is restricting exposure.
- One slow tray: Compare similar-thickness pieces on different levels. If most pieces on one level lag, an allowed tray swap is more useful than flipping every strip.
- One slow edge: In a cabinet machine, a front-to-back difference may respond to turning the tray 180 degrees, provided it still seats correctly.
- Scattered slow pieces: Thickness, folds, or heavier marinade deposits may explain the difference. Moving the whole tray won’t make a thick strip dry like a thin one.
Rear fans generally move air across trays, while stackable machines use different vertical or distributed air paths. The fan’s location alone doesn’t tell you whether turning is necessary. I’ve learned more by comparing two similar strips from different positions than by fussing with an entire load. That simple comparison also keeps me from blaming the dehydrator for uneven knife work.
Step-by-Step Method
This method is for sliced, whole-muscle jerky. Ground-meat strips need their own validated preparation method and can be fragile when lifted. Start with your machine’s manual and a tested jerky recipe; the turning decisions below fit around that process.
Prepare a batch that can dry evenly
Choose lean eye of round, top round, or bottom round, trim visible fat, and slice uniformly, no thicker than 1/4 inch. Partially firming the meat in the freezer makes consistent slicing easier. Across the grain gives an easier bite; with the grain produces a longer, tougher chew. Neither direction creates a special need to flip.
Marinate in the refrigerator. Follow the USDA’s home jerky guidance: heat beef to an internal 160°F, or poultry to 165°F, before dehydrating, using a food thermometer to verify several strips. Steam or roast as directed by a tested method. A dehydrator dial reading 160°F does not establish that the meat reached 160°F. Turning strips cannot replace this heating step.
For checking thin meat, look for a thin-tip digital food thermometer with a short sensing area. Insert it sideways into the thickest portion so the sensing area sits inside the meat. As an Amazon Associate, I earn from qualifying purchases.
- 1. Load open space around every strip. Drain excess liquid after the recipe’s heating step, and arrange strips flat in one layer without touching. Leave air channels and vents clear. Follow the manual’s required tray count, including any empty trays it requires.
- 2. Start drying at the recipe’s specified setting. Use equipment that meets the method’s temperature requirements. Keep the lid or door closed between checks. Don’t lower the temperature simply because you’re worried about a dry edge.
- 3. Inspect a small sample at the first check. Follow the manual’s checking schedule. If it gives none, around two hours is a reasonable observation point for ordinary sliced beef, not a promise of doneness. Compare similar strips at different levels and lift one to inspect its underside.
- 4. Make the smallest useful adjustment. Flip pieces with damp undersides, swap faster and slower trays if permitted, or turn a tray front to back. If everything looks even, leave it alone. Follow the manual’s power-off and handling instructions when opening or moving parts.
Support a strip as you lift it instead of yanking one end. For sticky recipes, dehydrator mesh screens can make release easier. Choose food-contact screens approved for your model and operating temperature, with openings that preserve airflow. A solid fruit-leather sheet is a different accessory; use it for jerky only as your manual permits.
Check the adjustment without babysitting
If you moved something because it was drying unevenly, compare those same positions at the next scheduled check. Don’t expect a wet underside to match the top immediately. Record the tray position, approximate thickness, and adjustment. On the next batch, that note tells you whether you have a repeatable equipment pattern or just one awkward strip.
Time, Texture, and Doneness Cues
There is no universal halfway point for flipping. Thickness, heating method, loading, marinade, and the machine all change drying time. The National Center for Home Food Preservation’s jerky method calls for beginning doneness checks after three hours and notes that meat heated in marinade dries faster. Treat that as guidance within its method, not a deadline for every recipe.
- Cool the test piece first. Warm jerky feels softer and more flexible. Remove a sample with clean utensils and let it cool before assessing its bend.
- Look for a bend with cracks. Properly dried jerky should crack when bent without snapping cleanly in two. A brittle strip has usually gone beyond a pleasantly chewy finish.
- Inspect the thickest part. Tear a cooled sample and check for a distinctly wet, soft center. A dry-looking exterior alone is insufficient. Texture checks assess drying; they do not prove that pathogens were killed.
- Remove finished pieces individually. Sample several tray positions, especially the slow area you identified. Near the finish, check in roughly 30-minute increments rather than giving the entire batch another long block of time.
A sugary marinade can remain tacky after the meat has dried, while fat can leave an oily shine. Neither means “flip everything again.” Compare the underside with the upper face and inspect the center. I’ve over-dried sweet jerky by chasing a perfectly dry surface. The better lesson was to stop treating stickiness as my only test.
For a softer bite, slice across the grain and keep thickness consistent rather than deliberately leaving the center damp. Once finished, cool the jerky completely before packaging. I refrigerate home batches and freeze longer-term portions; a successful bend test doesn’t establish a measured water activity or guarantee shelf stability.
Mistakes That Ruin the Batch
Overloading to save a second run is a false economy. I’ve squeezed in the last handful of strips, then spent the afternoon managing wet patches and dry edges. Buying lean round on sale makes sense; sacrificing the batch to crowded trays doesn’t. Keep the remaining prepared meat refrigerated until you can process it properly. If uneven drying keeps happening despite good spacing, work through the broader guide to jerky that isn’t drying evenly.
Repeated flipping can create work without fixing the cause. Thin ends still finish before thick centers, and a blocked vent stays blocked. Opening the machine repeatedly also interrupts its drying conditions. Don’t add fresh marinade during a turn: it re-wets the surface, and used raw-meat marinade introduces another handling concern. Set up flavor before drying, keep utensils clean, and reserve turning for a visible drying difference. If strips stick, support and gently release them instead of shredding half the tray to satisfy a timer.
Bottom Line
My rule is straightforward: flip for a wetter underside, rotate trays for a slower location, and leave evenly drying jerky alone. Let the appliance manual determine which movements are appropriate. One purposeful adjustment beats a routine of turning every piece whether it needs help or not.
For your next batch, make uniform slices, leave room around them, complete the safe heating step, and compare a few positions during drying. Pull finished pieces as they’re ready. That gets you closer to consistent chew without buying a new machine or spending the whole afternoon standing over the trays.