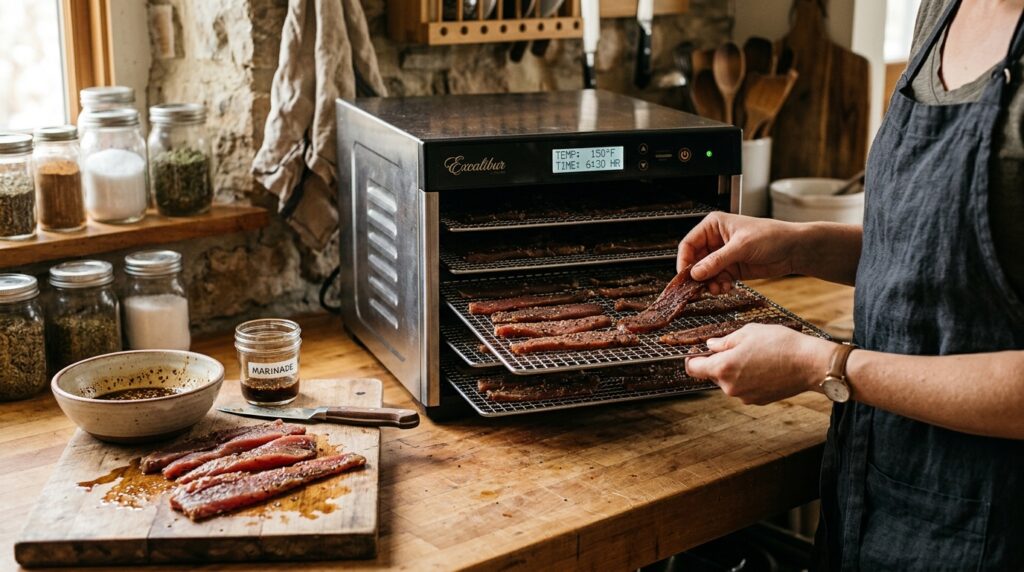
I would steer you toward jerky for your first home batch, and toward biltong when you want thin, savory slices with the beef doing most of the talking. After eight years and more than 400 batches in my Milwaukee garage jerky lab, I judge a method by the chewing, the cleanup, and whether I can repeat it without wasting a roast. With three kids waiting on snacks, those details beat an argument about which name sounds more authentic.
If you are comparing biltong vs jerky before buying meat or equipment, the biggest difference is what happens before the snack bag. Jerky usually starts as thin strips and uses a heat treatment before drying; traditional biltong starts thicker and relies on a specific vinegar, salt, and drying process. You can like both textures, but you cannot swap their safety steps. Here is where each earns its place in my kitchen.
The Short Answer
Jerky wins for straightforward home production; biltong wins for people who prefer a sliced, beef-forward snack and are prepared to buy it from a reliable producer or follow a specifically validated process. Both can start with lean whole-muscle beef. Jerky is generally sliced before drying, often marinated, then heated and dried. Biltong generally starts as thicker strips or slabs, receives vinegar and salt treatment with spices such as coriander and black pepper, and dries slowly before being sliced for eating.
The important word is process. Vinegar does not automatically make raw beef safe, and a dehydrator dial does not prove that meat reached a safe internal temperature. For home jerky, USDA FSIS recommends heating meat to 160°F and poultry to 165°F before dehydration, followed by drying at a steady 130–140°F. Traditional biltong without that heat step needs its own scientific support; the jerky recommendation cannot validate it.
What curing means here
People use “cured” to describe several different things. In a biltong discussion, it often means the vinegar-and-salt treatment before drying. In a jerky recipe, it might mean marinating, or it might specifically mean using a measured curing salt containing nitrite. Those meanings are not interchangeable. Neither product name tells you whether nitrite was used, and ordinary salt is not a substitute for a specified curing-salt ingredient.
I treat seasoning choices and preservation steps as separate decisions. More coriander can change flavor; it does not give me permission to shorten a safety-critical drying schedule. Likewise, calling a marinade a “cure” does not establish what pathogens the finished process controls. That distinction matters much more than whether the seasoning packet says traditional, natural, or artisanal.
Comparison Table
This comparison covers typical whole-muscle beef versions. Individual brands and validated recipes vary, especially in sweetness, final moisture, and storage requirements.
| Decision | Jerky | Biltong |
|---|---|---|
| Meat preparation | Thin, even strips cut before drying; grain direction sets the chew. | Thicker pieces dry first, then are commonly sliced across the grain. |
| Typical treatment | Salt-based marinade or dry seasoning; sugar, smoke, and chile are optional. | Vinegar, salt, coriander, and pepper are common; the exact treatment matters. |
| Heat and drying | USDA home guidance uses a pre-drying heat step, then heated dehydration. | Traditional methods use lower-temperature drying over days; safety support must match the process. |
| Texture | Chewy strips, from tender to firm depending on cut and drying. | Thin slices can be tender or dense; wetter and drier styles differ substantially. |
| Home ease | Easier starting point with an oven, dehydrator, and food thermometer. | More demanding control of treatment, temperature, humidity, airflow, and endpoint. |
| Cost and yield | Finished cost rises as water and trim leave the batch. | Same principle; a moister product may weigh more without containing more beef solids. |
| Cleanup | Marinade bowls, racks, and multiple drying trays. | Preparation surfaces, hanging hardware, drip collection, and the drying enclosure. |
| Storage | Depends on processing, dryness, packaging, and whether opened. | Also process-dependent; a soft center is no proof of shelf stability. |
The table makes biltong look slower because it usually is, but elapsed time is only part of the workload. Jerky asks for more slicing and tray loading up front. Biltong asks you to manage a drying environment for longer. A box with a fan may move air; that alone does not establish that it can reproduce a researched food-safety process.
Where Each Option Wins
Jerky wins on home practicality and adjustable chew
For a family snack batch, jerky lets me make useful texture changes without buying a different cut. Slicing across the grain makes the fibers easier to bite through; slicing with it gives a longer, tougher pull. Consistent thickness matters more than a fancy marinade. My most useful lesson from uneven batches is simple: spend another few minutes with the knife before asking the dehydrator to fix your work.
For this comparison, I would buy the same lean roast for either method. That keeps the decision about processing rather than turning it into another ranking of beef cuts. Jerky needs enough even slices to load the trays efficiently; biltong needs pieces that match the dimensions of its supported process. An awkward tapered end is easier to turn into separate jerky strips than to make match a thick biltong piece.
Jerky also gives you plenty of flavor freedom: pepper-heavy, smoky, hot, lightly sweet, or unsweetened. Sugar is not a requirement for something to be jerky. For readers who like biltong’s coriander-and-pepper profile but want the USDA home jerky approach, a biltong-inspired jerky seasoning is a sensible compromise. Keep the jerky heat and drying method; describe the flavor honestly rather than treating the two processes as equivalent.
Biltong wins when you want the beef and sliced texture
Biltong is the one I would reach for when I want the meat to lead, with vinegar tang and coriander behind it. Cutting a dried piece into thin slices produces a different eating experience from working through a long jerky strip. The outer surface and center can also give contrasting textures. That is part of the appeal, although a moist center changes the storage discussion.
Neither product has a monopoly on tenderness. Very dry biltong can be hard, and jerky cut across the grain can be easy to eat. When buying, look for descriptions of dryness and slice thickness instead of assuming that biltong always means soft. If you have never tried it, a small commercial package is a better first investment than building an enclosure around a texture you might not enjoy.
Health and protein: compare the labels, not the names
For biltong vs jerky nutrition, I would line up equal serving weights and compare protein, sodium, added sugar, calories, and fat. A sweet jerky and an unsweetened biltong can look very different, but an unsweetened lean jerky may narrow that gap considerably. Biltong can contain added sugar, and fatty biltong is a different comparison from aggressively trimmed beef jerky. The product name does not settle which is healthier.
Drying also changes the denominator. Remove more water and nutrients become more concentrated per ounce; leave more water and the same ounce includes less meat solids. That makes protein-per-ounce comparisons partly a moisture comparison. For shopping, calculate the protein in the portion you actually eat and check its sodium too. I would choose between two real labels before awarding either entire category a nutrition trophy.
What the Tradeoffs Feel Like in a Real Batch
The same roast needs different preparation
With jerky, the knife establishes nearly every piece’s drying distance before loading. For my usual strips, I aim for an even 1/8 to 1/4 inch, within the recipe’s directions; mixing those thicknesses on one tray creates different finishing times. With biltong, the larger cross-section becomes a major process variable, and final slicing happens later. You cannot simply keep a jerky marinade, triple the thickness, turn off the heat, and call the result a proven biltong method. Thickness affects how treatments reach the meat and how moisture moves out.
I trim visible fat for my regular jerky batches because I want consistent pieces and predictable eating quality. Biltong fans sometimes deliberately keep a fat edge for richness. That is a taste preference, not a free increase in lean-meat yield. If batch economics is the goal, start both comparisons with similarly trimmed meat and record the trim separately. Otherwise, you are comparing two different shopping baskets.
The calendar favors jerky too: after refrigerated marination, thin strips commonly fit into a drying session measured in hours. Traditional biltong occupies its drying space for days. Those are planning differences, not doneness timers. A thick piece, overloaded tray, or humid room can change the schedule. I leave myself time to finish the supported process instead of promising the kids a batch at exactly four o’clock.
Heat treatment and drying solve different problems
The home jerky sequence separates pathogen reduction from moisture removal. FSIS explains that evaporative cooling can keep meat cooler than the surrounding air, and bacteria become more heat-resistant after drying. Its guidance calls for steaming or roasting to the specified internal temperature, checked with a food thermometer, before dehydrating. Marinate under refrigeration and keep equipment clean. Those are practical controls, not details to replace with a bend test. See the FSIS jerky guidance.
For biltong, researchers have demonstrated substantial pathogen reduction without a heat lethality step, but under defined conditions. A 2020 Salmonella challenge study evaluated particular formulations, treatments, and controlled drying conditions; nearly all tested approaches achieved a five-log reduction, meaning a 100,000-fold decrease. That finding supports those studied approaches. It does not validate every vinegar soak or home drying box.
A separate challenge study examining other pathogens and marinade components reinforces why the complete process matters. Spices alone did not provide the same performance as the full treatment. Coriander belongs in the flavor discussion; it is not a stand-alone safety intervention. Salt, vinegar, treatment method, meat dimensions, drying conditions, and duration need to be considered together.
For commercial process evaluation, the FSIS guideline for fermented, salt-cured, and dried products specifically cautions that research summaries are insufficient by themselves: the full study must be assessed for applicability. My home-kitchen takeaway is straightforward: if a biltong method cannot explain which validation it follows, I would not improvise the missing safety controls.
Airflow, equipment, and the misleading dry outside
Jerky’s thin strips fit household dehydrator racks well, provided pieces have space around them. Biltong needs hanging clearance and control of the environment around thicker meat. Excessively aggressive surface drying can leave a firm outside while moisture remains inside. More fan speed is not automatically better, and a Milwaukee garage changes considerably between a humid summer afternoon and a cold fall morning.
A food thermometer, kitchen scale, and batch notebook earn their place in my jerky setup before a powered slicer does. For biltong, measuring chamber temperature and humidity helps document conditions, but those readings alone do not prove product safety. A humidity sensor measures air; a water-activity instrument measures a property of the food. They are not substitutes for each other.
Cleanup is where biltong can look easier than it feels. Hanging a few pieces avoids spreading dozens of strips across racks, but the hooks, drip area, enclosure, and final slicing board still need attention. Jerky gives me more tray washing, especially with sticky marinades. I start soaking removable racks promptly after unloading; dried-on sugar is a poor reward for saving ten minutes at the sink.
Yield is where the cheap-snack math gets honest
Here is an illustrative budget, not a promised yield. Suppose you buy three pounds of beef for $6 per pound and finish with 18 ounces of dried product. The meat alone costs $1 per finished ounce: $18 divided by 18. If a different endpoint produces 24 ounces, the meat cost becomes 75 cents per ounce, but some of that apparent bargain is retained water.
Seasoning, electricity, packaging, trim, and failed batches sit on top of that number. My cost-saving rule is to weigh the purchased meat, trimmed meat, and cooled finished batch. That shows whether a sale cut actually saved money. Never stop drying early just to improve the spreadsheet; use the endpoint required by the supported process. Smaller batches also make sense while you are learning what your household will finish.
Storage depends on the product you actually made
A dry-looking surface, pleasant smell, or target percentage of weight loss cannot establish shelf stability on its own. Water activity describes water available for microbial growth, which is different from total moisture. That distinction is especially important when comparing soft biltong slices with much drier jerky strips. Neither product name identifies one uniform storage condition.
For purchased products, follow the label before and after opening, including refrigeration instructions. For homemade batches that have completed an appropriate safety process but lack established room-temperature storage support, my conservative choice is refrigeration for near-term use or freezing in small portions. Refrigeration does not rescue meat made with an inadequate process. Vacuum packaging also does not turn an unvalidated batch into shelf-stable food.
Which One I Would Choose
For making at home, my winner is lean whole-muscle jerky. It fits ordinary equipment, gives me direct control over slice thickness and chew, and has clear USDA consumer guidance for heating before drying. I would spend my money on a sound thermometer, consistent slicing, and a lean roast before chasing an elaborate cabinet. That is the practical choice for keeping three kids supplied without making snack production a second job.
For eating, I would choose biltong when I want thin, savory slices and buy a small package from a producer with clear storage instructions. Home biltong becomes a reasonable project when I can follow an appropriately validated process and control its conditions. Choose jerky for the easier home workflow, biltong for its distinctive sliced texture, and judge both on the actual formulation and handling. The name on the bag never does the safety work for you.